Archive
Install vSphere in VMware Workstation using EFI instead of a BIOS
(U)EFI is the next generation of BIOS. When you install ESXi 5.0 on VMware Workstation 8, it just uses a regular BIOS.
It is however possible to use EFI instead of BIOS.
The vSphere Installation and Setup guide states that you shouldn’t change the boot type from BIOS to EFI on an already installed ESXi host. It does work however in VMware Workstation. But for production systems, just stick to the guide and reinstall the host using EFI instead of BIOS on your hardware server.
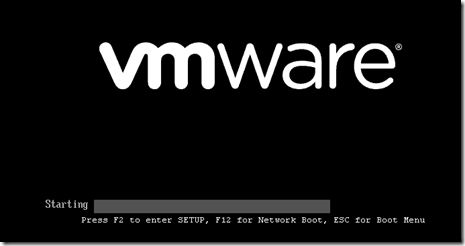
Now, your normal Virtualized vSphere host in VMware Workstation uses a BIOS. Notice this in the startup screen when you boot the VM:
Starting vSphere Client in other locales
The vSphere Client is available in different locales. Depending on your system locale, vSphere Client will be started in that locale. But sometimes, you may want to change the locale of vSphere (if you want to write a manual for people who have other locales and you want to take screenshots, …).
Open a Command Prompt and cd into the directory where VPXClient resides (Program Files\Infrastructure\Virtual Infrastructure Client\Launcher).
Start vpxclient.exe –locale xx where xx is one of the following:
| en_us | English |
| de_de | German |
| fr_fr | French |
| ja | Japanese |
| ko | Korean |
| zh_cn | Simplified Chinese |
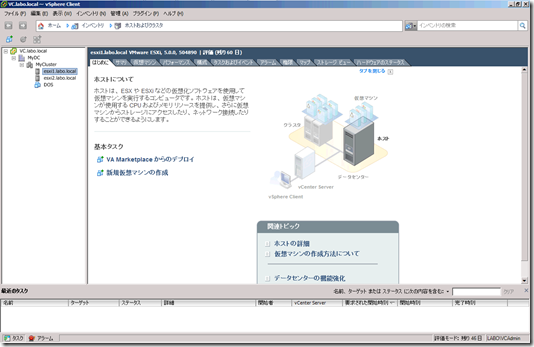
So if you want to start vSphere Client in Japanese, start vpxclient.exe –locale ja.
And this gives you a Japanese vSphere Client. I don’t dare to click anything as it’s all Chinese euhm, Japanse to me 🙂
Enjoy!
Building the Ultimate vSphere Lab – Part 12: Finalizing the Lab
Our basic setup is almost ready. We just need to give our VMs some networks to connect to.
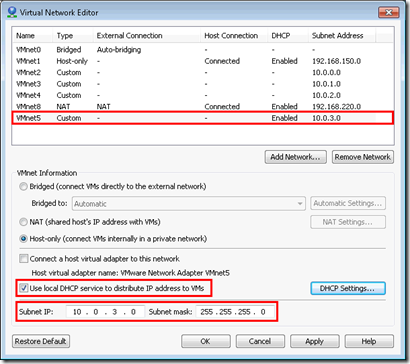
Let’s create a new VMnet5 network in the Virtual Network Editor. Use range 10.0.3.0/255.255.255.0 and enable the Use local DHCP service to distribute IP address to VM.
Change the DHCP Settings and fill in a valid start and end address.
Building the Ultimate vSphere Lab – Part 11: vMotion & Fault Tolerance
Next up is the creation of our vMotion interface.
Let’s take a look at vSwitch0 first:
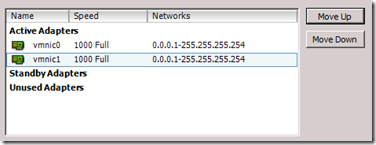
Open Properties… and remove the VM Network portgroup. Then, open the properties of the vSwitch and put both vmnic adapters as active.
Now open the properties of the Management Network and set vmnic0 as active and vmnic1 as standby.
Building the Ultimate vSphere Lab – Part 10: Storage
We now have a cluster, but still not a usable because we don’t have Shared Storage yet. So let us add some 🙂
We will go for an iSCSI solution. This makes perfect sense since this can be virtualized perfectly. Many iSCSI appliances exist on the market today. Lefthand, UberVSA, OpenFiler, … I will however go with the easiest solution: installing a Software iSCSI Target on Windows Server.
Again, various flavors exist, but what most people don’t realize is that Microsoft has it’s own free iSCSI Target. I has all the basic functionality you need (CHAP, Snapshots, …). No replication or other advanced stuff is supported, but we don’t really need that for now.
Let’s start by downloading the goodies: http://www.microsoft.com/download/en/details.aspx?id=19867
Extract it and put it on the Shared Folder to the VMs can access it.
Now, before we install the iSCSI Software, we need to change our VM to support it. We will use our vCenter Server for Storage. If you have the resources on your PC, a dedicated VM would be better (but then, i would go for a dedicated iSCSI appliance like Lefthand, OpenFiler, …).
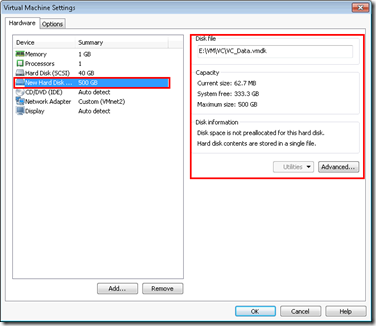
Give your vCenter VM a second Hard Disk of 500GB and put it on HDD storage.
Building the Ultimate vSphere Lab – Part 9: ESXi
Now that we have our vCenter running, it’s time to deploy our ESXi hosts.
Depending on the amount of memory you have, you can deploy as many ESXi hosts as you want. Personally (I have 16 GB), i will install 2 of them.
Start by creating a new Virtual Machine. Take Custom for the type of configuration.
Hardware Compatibility is Workstation 8.0.
Building the Ultimate vSphere Lab – Part 8: vCenter
And now finally we come to the point where we are going to install a VMware product 🙂
Create yet another linked clone based upon the Windows2008R2_Base VM and name it VC. This must be stored on SSD as well.
The Virtual Network must be VMnet2. Add it to the domain labo.local.
Create a user VCAdmin in AD and make this a member of the Local Administrators group on the VC. Log on with that user.
First we need to install SQL Native Client. This is located on the SQL ISO (the one you installed SQL Server on @ SQL VM). It can be found in folder 1033_enu_lp\x64\setup\x64 and is called sqlncli.msi.
The installation is just a matter of Next, Next, Next, Finish 🙂
Now, hop on to the SQL VM and open SQL Management Studio.
Building the Ultimate vSphere Lab – Part 7: SQL Server
Create a new linked clone based on the Windows2008R2_Base template just like you did with the Domain Controller. Name the machine SQL.
Again, store it on SSD storage. Run through the OS Setup like you did with the Domain Controller.
Change the Network Adapter to VMnet2 to it can reach the DC.
If all goes well, you should get a DHCP address.
Give it a valid IP address and point the DNS Server to the DC.
Building the Ultimate vSphere Lab – Part 6: Domain Controller
The first VM we will deploy is our Domain Controller.
Right-click the Windows2008R2_Base VM and select Manage – Clone.
Base the clone on an Existing Snapshot named Version 1.0 (or whatever you called it before).
Building the Ultimate vSphere Lab: Part 5 – Prepare the Template
First, we will need to ‘protect’ our parent VM and make it a template. This ensure we don’t delete it or power it on. Select the Windows2008R2_Base VM and click Edit virtual machine settings.
Select the Options tab, go to the Advanced item and check the Enable Template mode checkbox.
